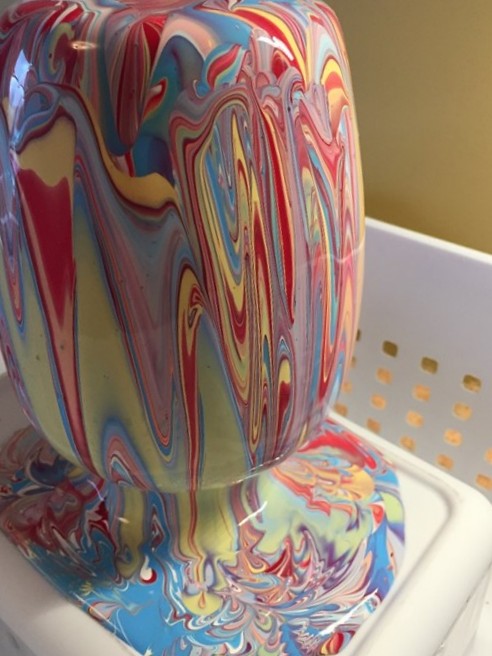
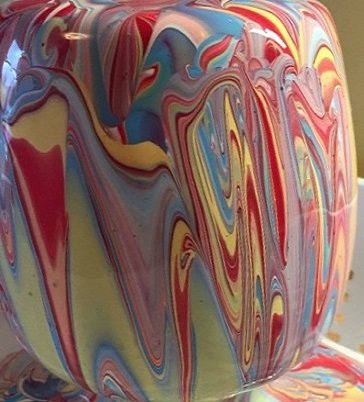
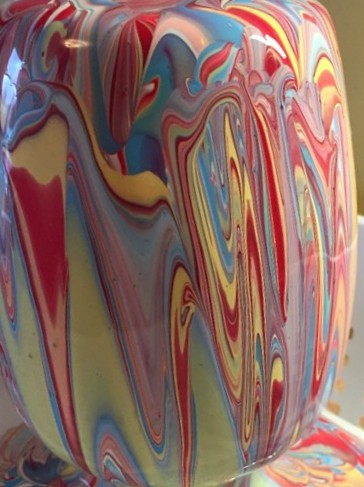
My friend Sheryl created today’s project. She’s super crafty and hopefully she’ll share again! Paint Pouring is a painting technique of pouring multiple acrylic paints onto canvas, pottery, glass, or other desired surface, leaving a fascinating marbleized effect.
My first project was on canvas, which turned out beautifully, and I was hooked! Next, I poured paints onto an overturned terra cotta flower pot. I used colors that would complement my yellow house, so I could set it on the front patio with a beautiful potted plant. I chose five colors to marble and it showed great on the patio.
Lately, I experimented with different types of paint, mediums, and shapes to see how they would affect the result. I’m sure there are experienced artists who have already figured these things out, but isn’t it fun to explore on our own?
Today I demonstrate how to pour a few paint colors on a glass vase. Let’s get started with Paint Pouring!
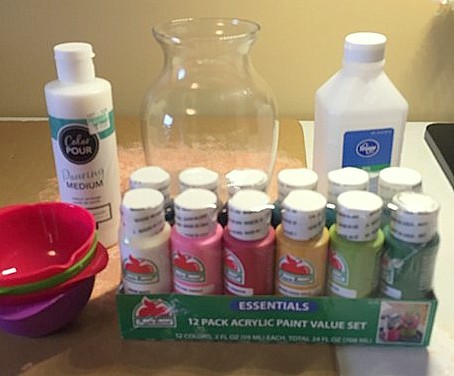
Materials:
A glass vase of any shape (I got this one at the Dollar Tree)
Acrylic paints in 3-5 colors of your choice
Rubbing alcohol (isopropyl alcohol)
1-2 Cotton balls
Paper cups or plastic bowls for mixing paint
Craft sticks for stirring
A Pouring Medium, like the one shown below
A couple of tips about a ‘pouring medium’ that I learned through experience:
A good pouring medium like the one shown here is important to stir into each of your paint colors to make a smooth easy pour. Once when I ran out of pouring medium, I tried using water to mix with my paints. Water seemed to break down the paint, so it didn’t pour well, and the colors became less vibrant.
Also, if you use thick acrylic paint that comes in tubes, you’ll need a good amount of pouring medium, which can be expensive. I suggest using liquid acrylic paint that won’t require nearly as much pouring medium.
The pouring medium used today was purchased at Hobby Lobby for about a dollar an ounce. Buying large quantities of pouring medium is more economical, especially online or at discount art supply stores.
How-To:
Prepare the glass vase by cleaning it with a cotton ball and isopropyl alcohol.
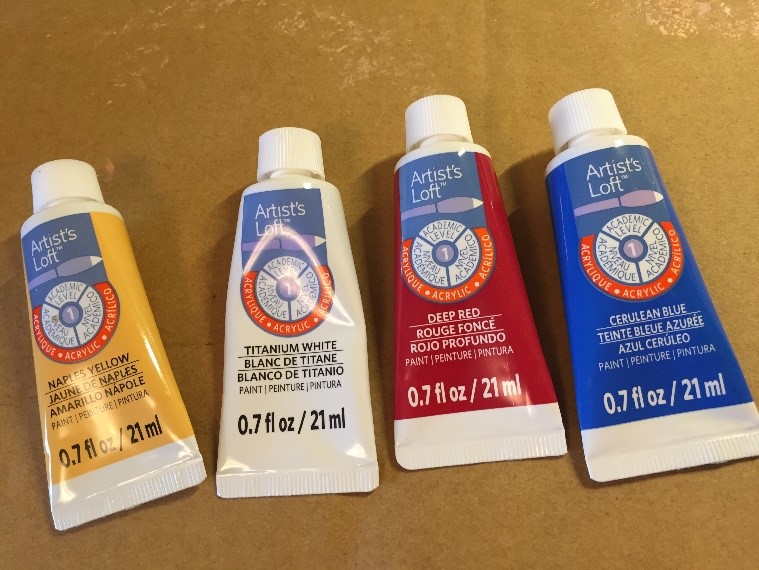
Select 3-5 colors that you want to use in your project. I chose four colors, shown below:
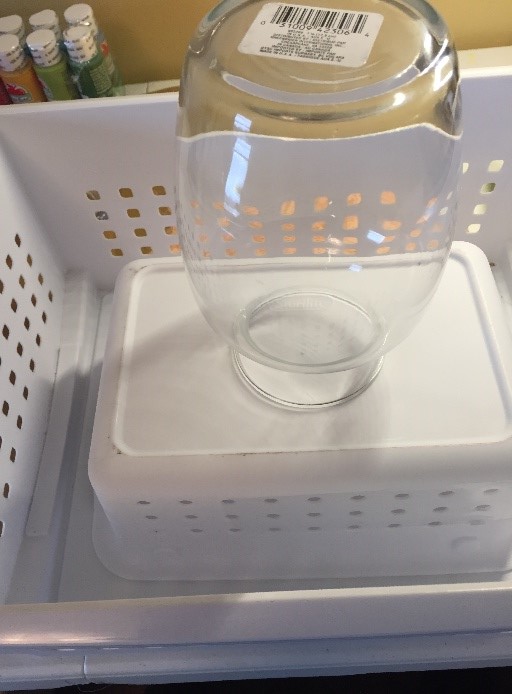
Set the vase upside down on a surface for draining excess paint. Some may choose to place their object on an old cookie sheet or basin. But prop up the vase so that it isn’t resting directly on the bottom surface. I used two plastic tubs, so the vase doesn’t end up sitting in an inch of paint puddle. However, a better solution would be to place the object over a paper towel roll, so it isn’t touching anything anywhere.
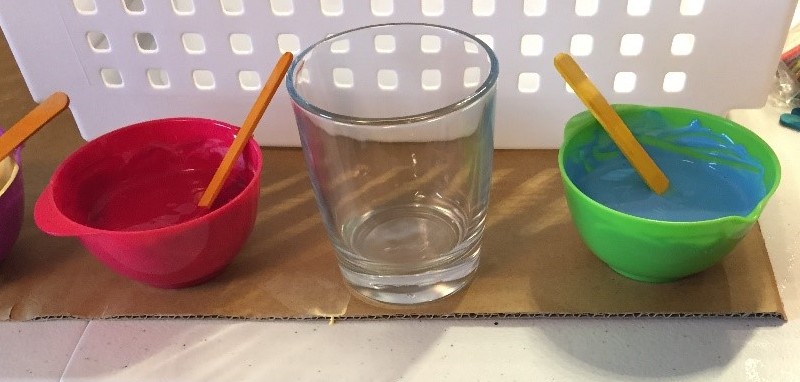
Use paper or plastic cups for each paint colors. Depending on the size of the object to paint, mix paint and pouring medium to make about ½-1 cup of each color. Because I am using tubes of thick paint, I mixed 3-part pouring medium to 1-part paint – a 4-to-1 ratio is preferred for a better pouring effect.
Now it’s getting exciting, friends! It’s time to begin layering your colors in whatever pattern you choose. I was consistent with the order of colors, but you don’t have to be. Change it up and make it interesting!
First, I used a drinking glass to layer colors, but you might want to use a plastic cup or something that can be easily discarded afterward and save some cleanup time.
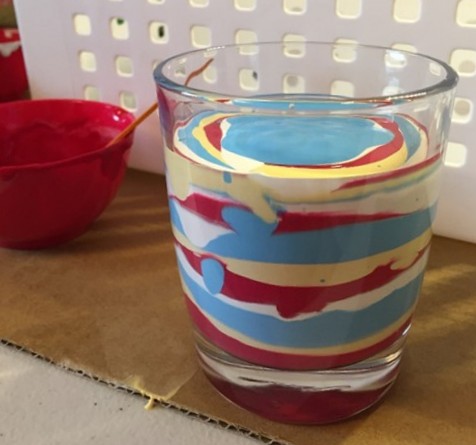
Whoo-hoo! Let the fun begin…. Very slowly begin pouring a drizzling stream of paint over the vase. If one side of the glass isn’t getting covered as well, simply pour directly over that area. Keep pouring a slow steady drizzle watching all sides of the vase. Because my vase dips in a bit, I needed to use a clean craft stick or my finger to try to “lead” the paint into that area.
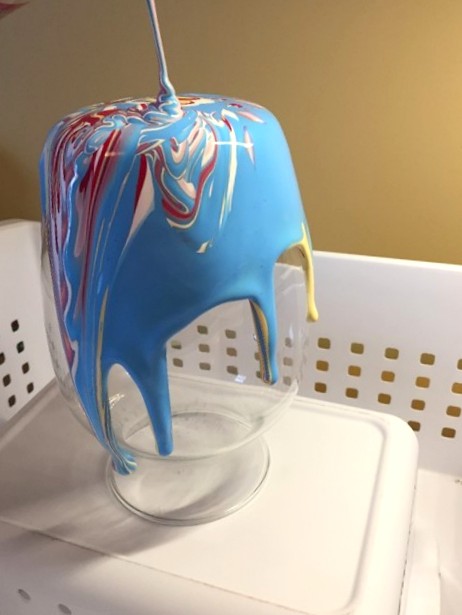
Admire your beautiful piece of art before leaving it to dry for at least a day. I know the temptation is to touch it or try to move it, but “just say NO”. After it has dried completely, display it proudly in your home. Once you’ve done one of these, you may become hooked, like me!