


Tis the season for Christmas Trees! I am fortunate to live in a place that Christmas Trees are the major export crop. There are so many ways to decorate a tree – you can have ornaments and lights in every shape, color, and size. As a big fan of the holiday season, I like having several trees around my house. This year I decided to decorate my home with trees both large and small and “trees” that aren’t necessarily the evergreen variety. I made several different “trees” to adorn the house. The “tree” cost investment is minimal by using ingredients and materials from around the house. Get your children involved in the crafting and snowy days become much more fun!
 |
| Homemade Christmas Trees |
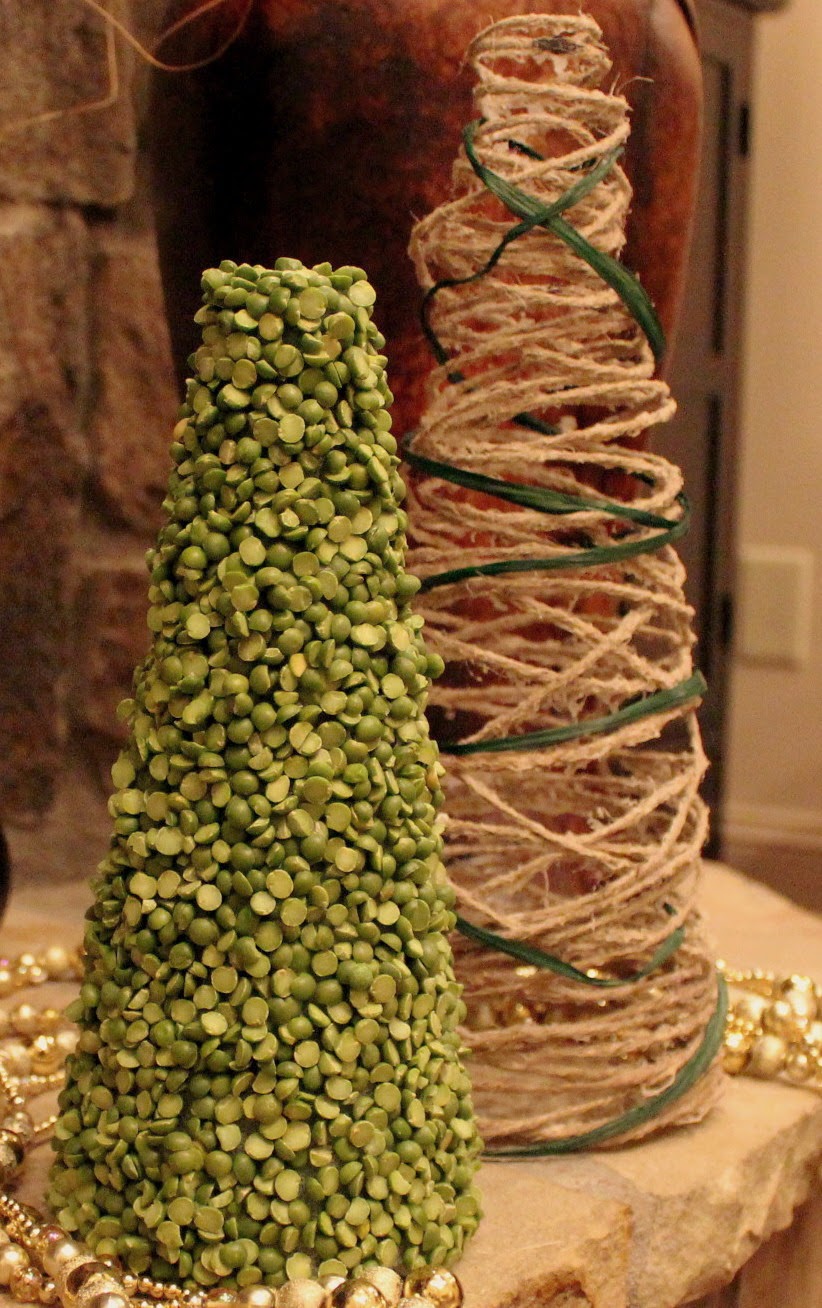
My first tree is a rustic variety. I decided to experiment with twine and once the tree was finished and dry, I threaded a bit of green raffia around the twine for color.
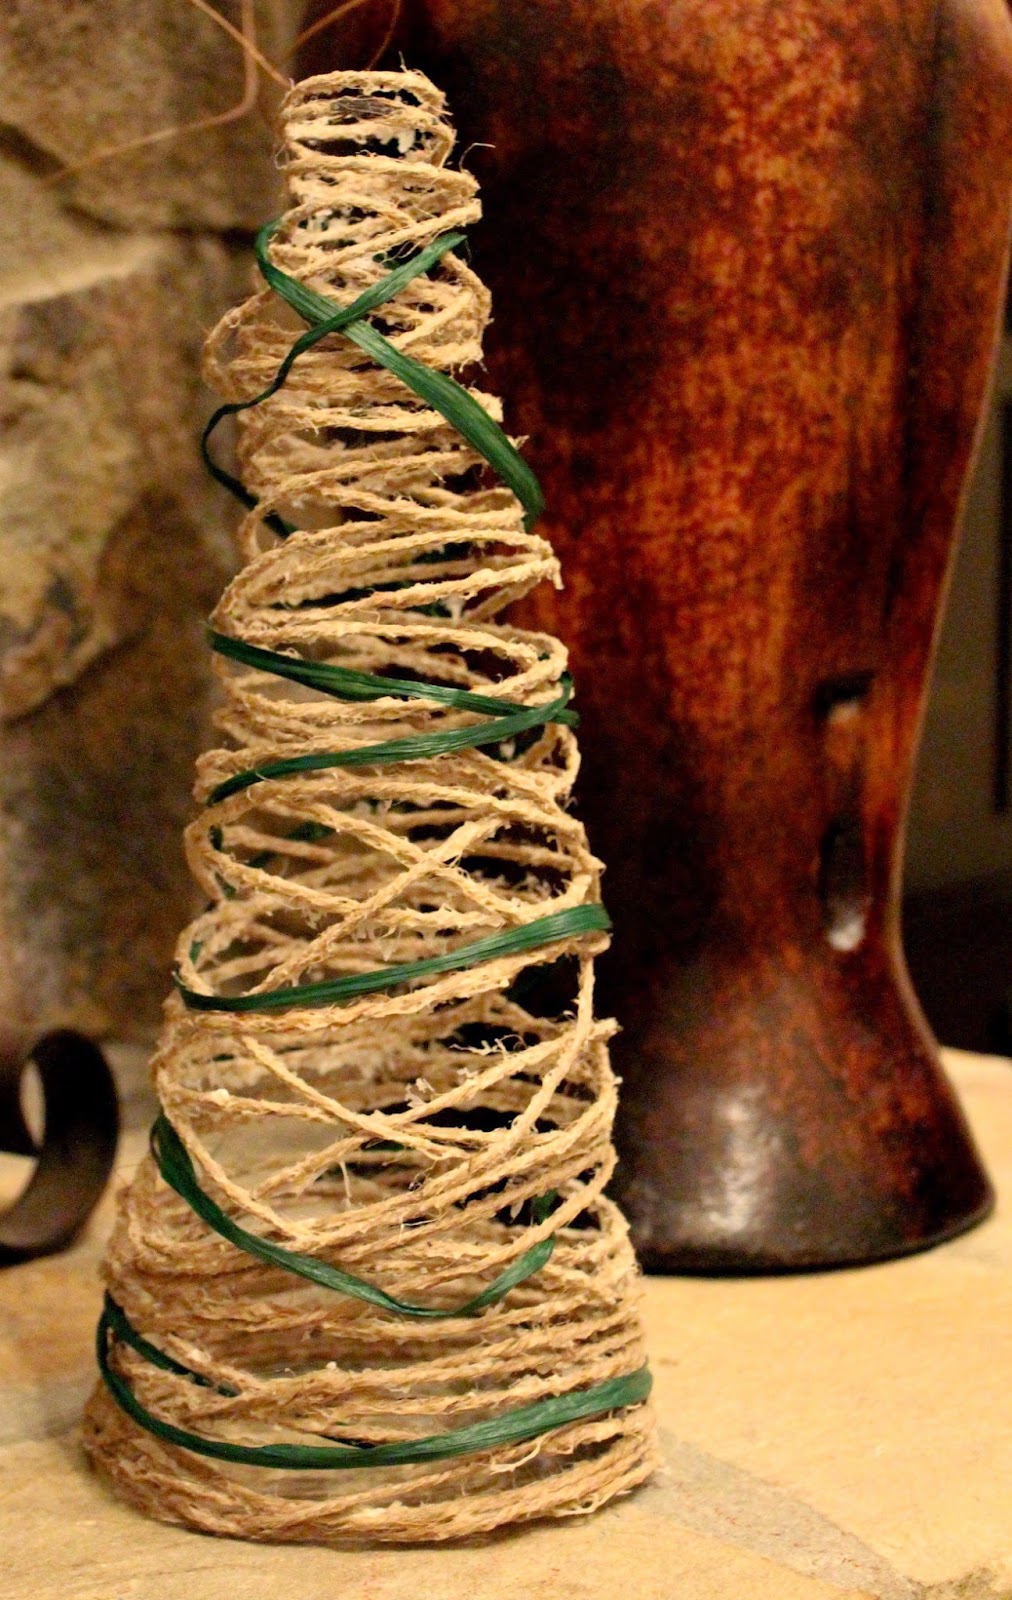 |
| Raffia Tree |
The material list is simple. I bought a 15″ cone from a craft store with a 40% discount coupon so it cost $4. You may use any cone size you’d like. Also, you need a roll of twine, glue, a little corn starch, and a piece of parchment paper. The total cost is about $6.
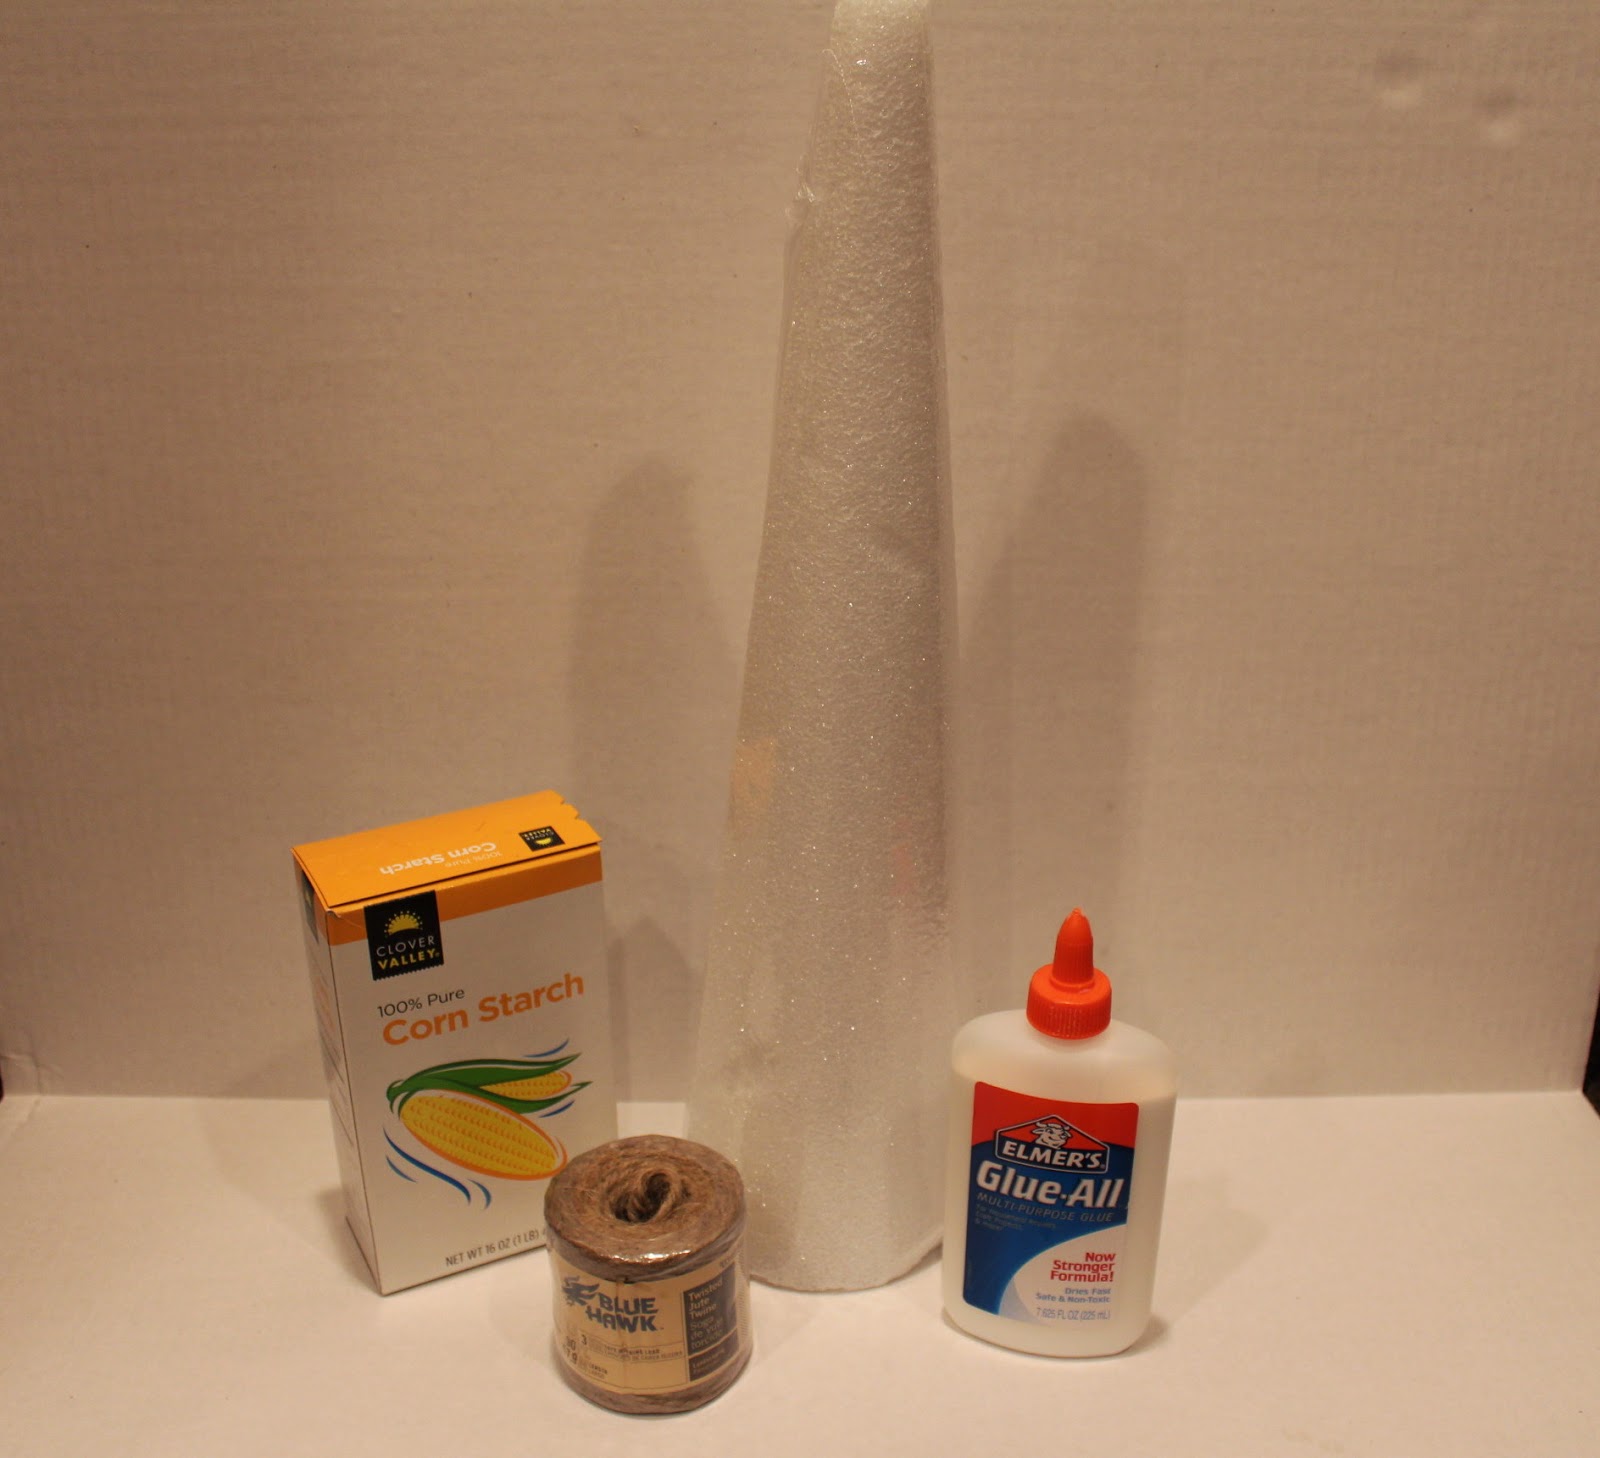 |
| Supplies |
Wrap the cone in parchment paper. This protects the cone so you may reuse it for another “tree” or another project.
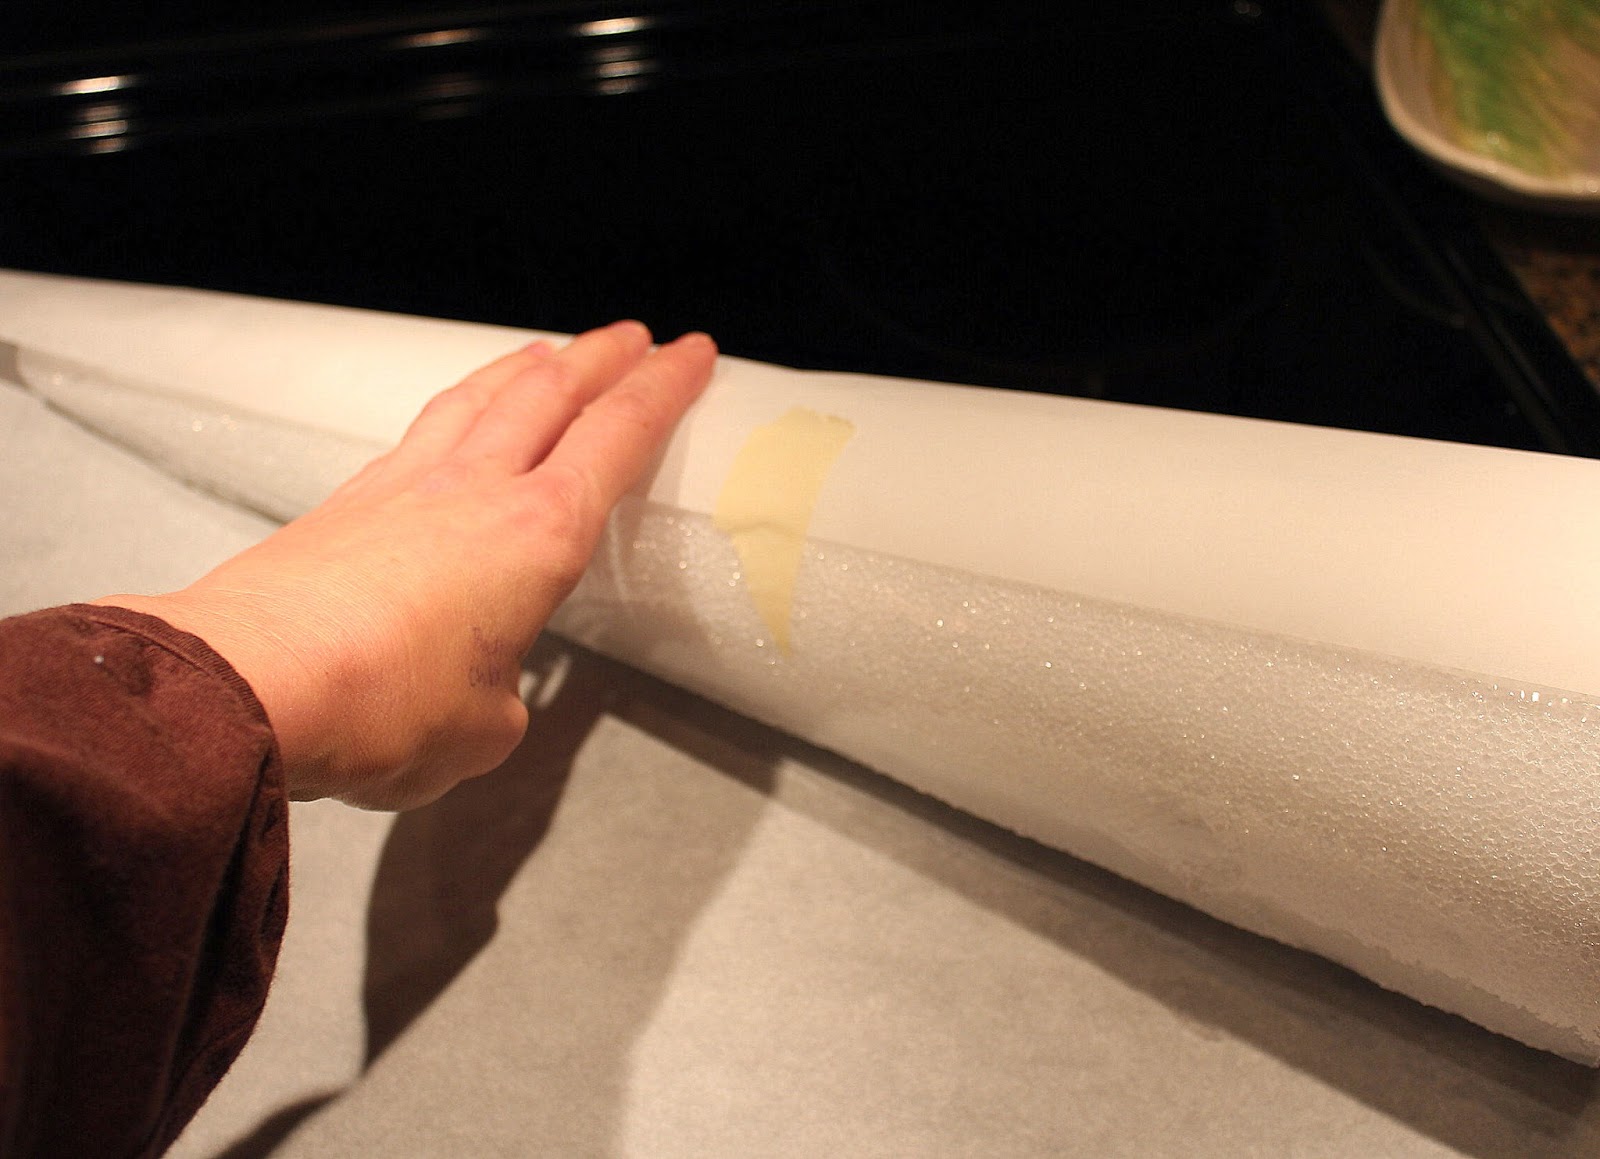 |
| Wrap cone in paper |
The twine needs to be stiffened. You can purchase fabric stiffener, but it is expensive. It is just as easy to mix up your own with kitchen ingredients. Mix equal parts glue and water. I used a little less than 1/4 cup of water and 1/4 cup of glue. Stir in corn starch until the mixture starts to thicken back to the consistency of regular glue. You will probably need several tablespoons of corn starch. It isn’t an exact science so add corn starch a little at a time until you feel the consistency is correct.
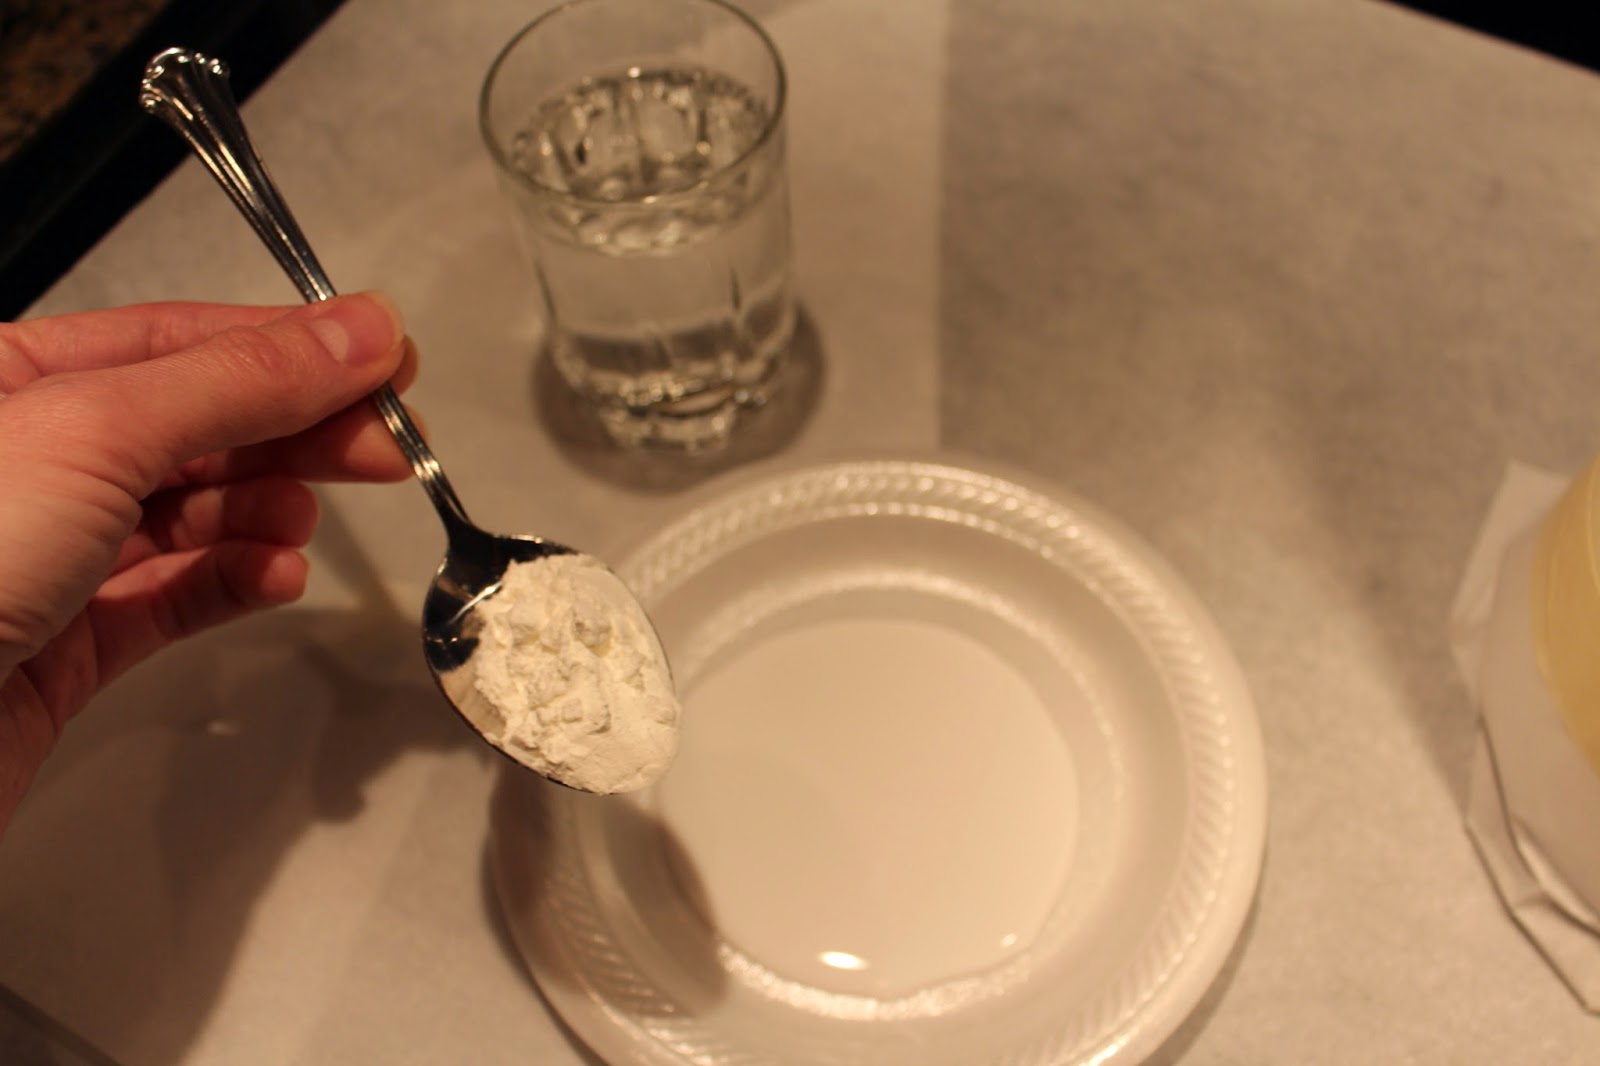 |
| Stir the glue mixture |
Dip the twine into the glue mixture and let it get completely wet.
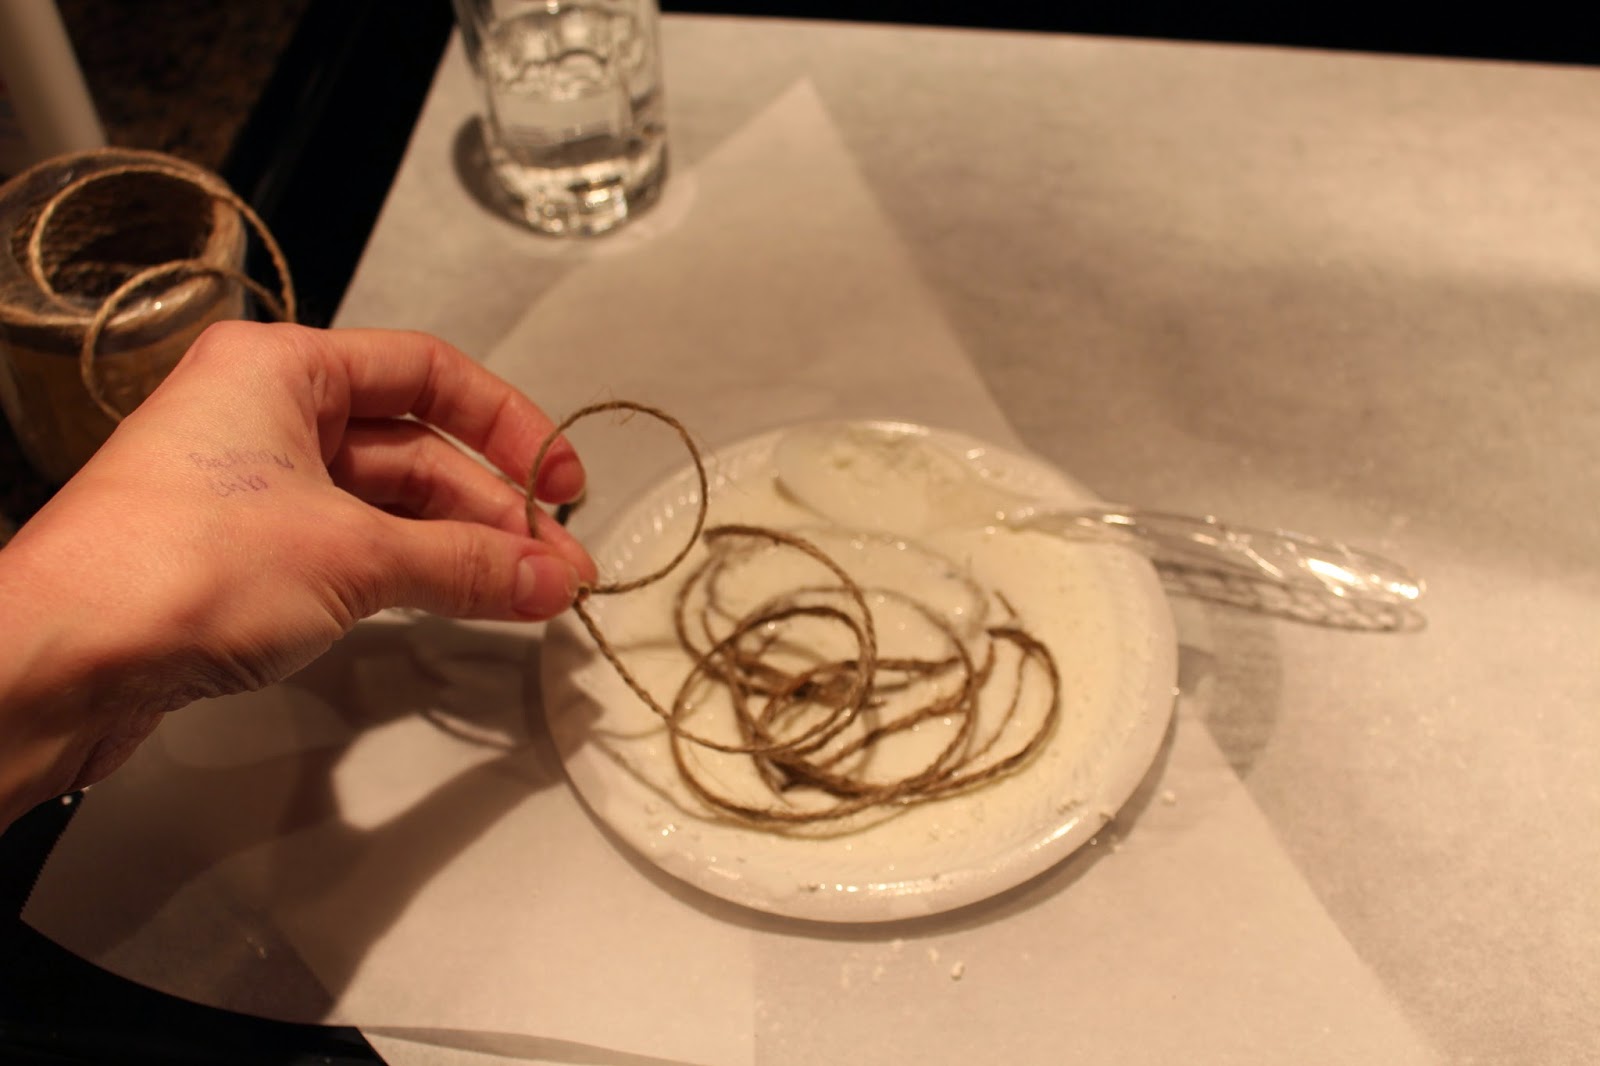 |
| Soak the twine in the glue mixture |
Wrap the wet twine around the paper on the cone. You can choose how you want your “tree” to look. You may wrap the twine very neatly in close lines or like me, you may wrap randomly and in no particular order.
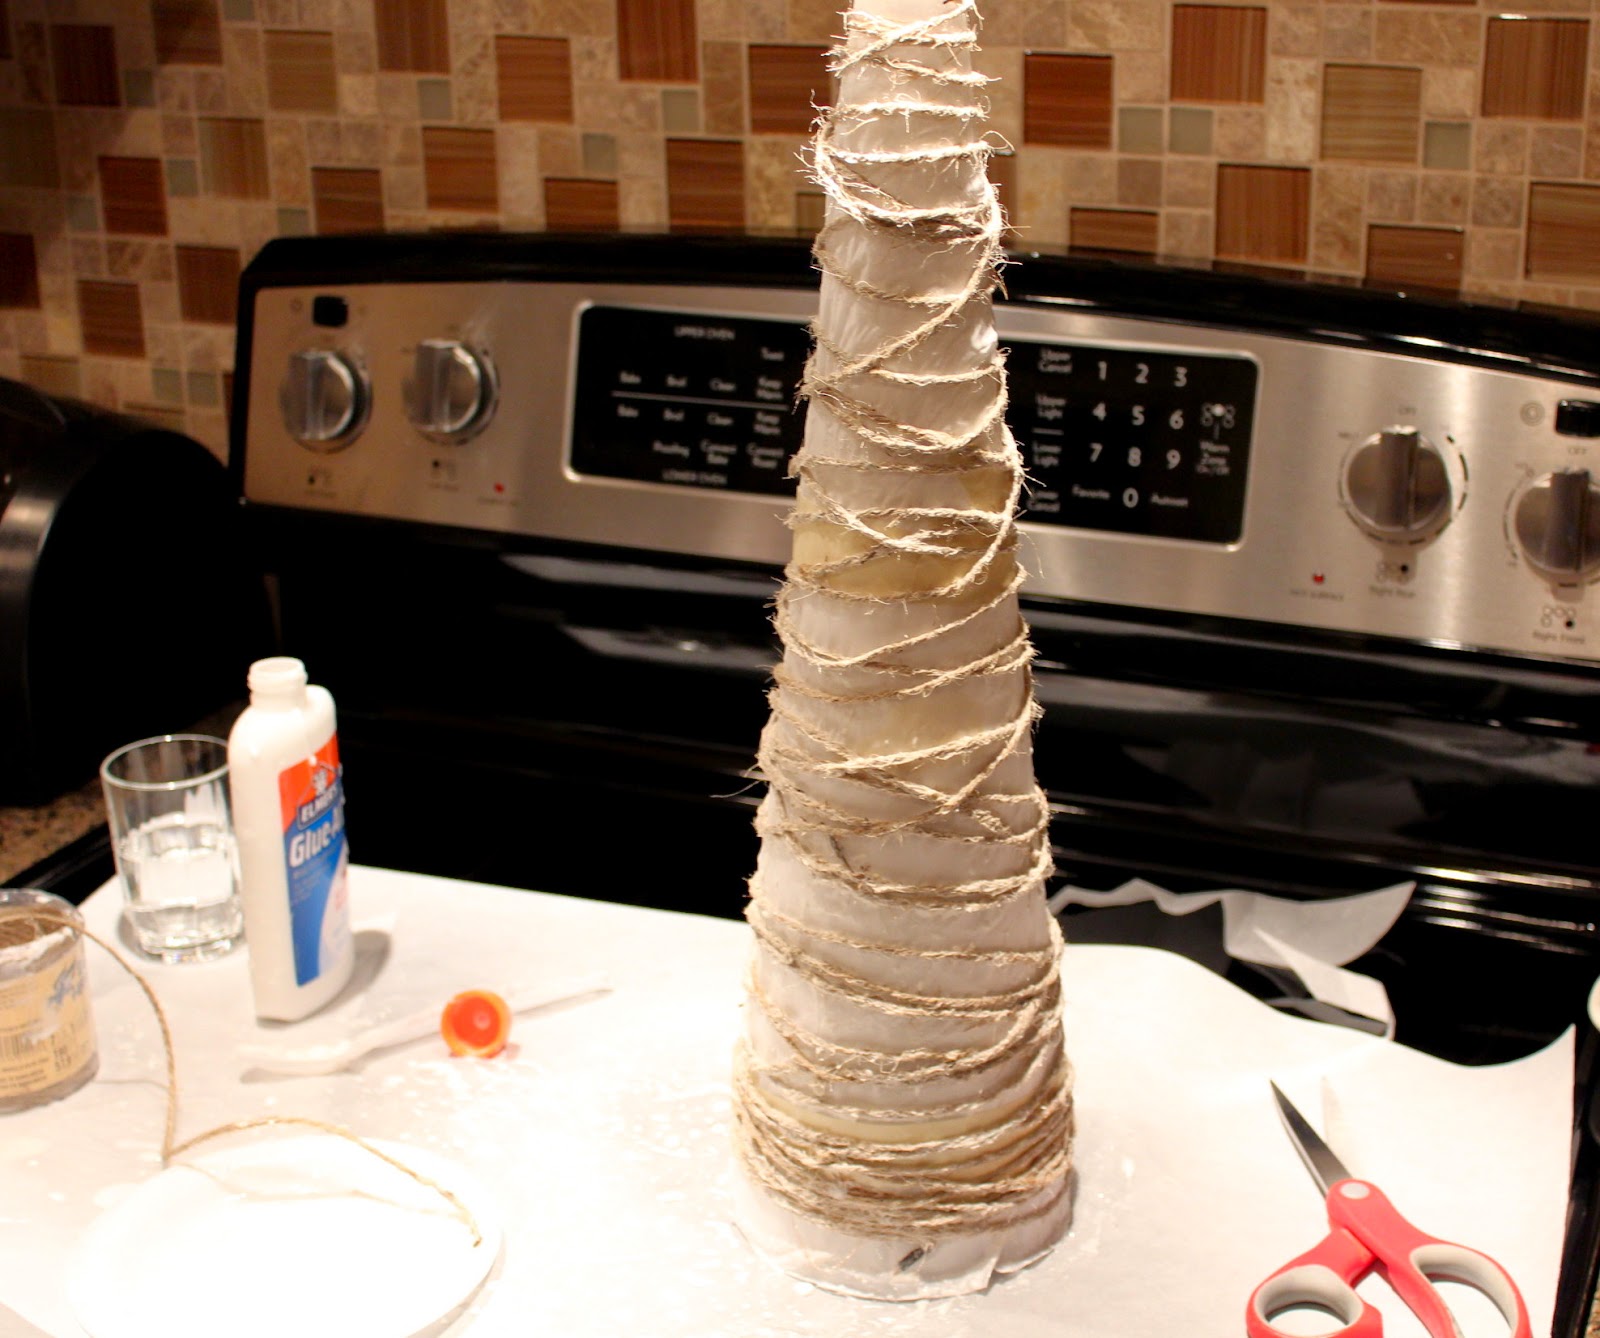 |
| Wrap the twine around the cone |
Allow the twine to dry thoroughly – overnight is a good idea. Once the twine is dry, gently pry the paper from the cone. The paper will be glued to the twine and should come off the cone in a perfect cone shape. I used a bamboo skewer to loosen the cone from the paper and it worked very well. Then I used the same skewer to tear the paper from the twine. Your rustic “tree” will stand on its own. For color I gently wrapped some green raffia around the twine. It would be pretty to glue some beads here and there for ornaments too.
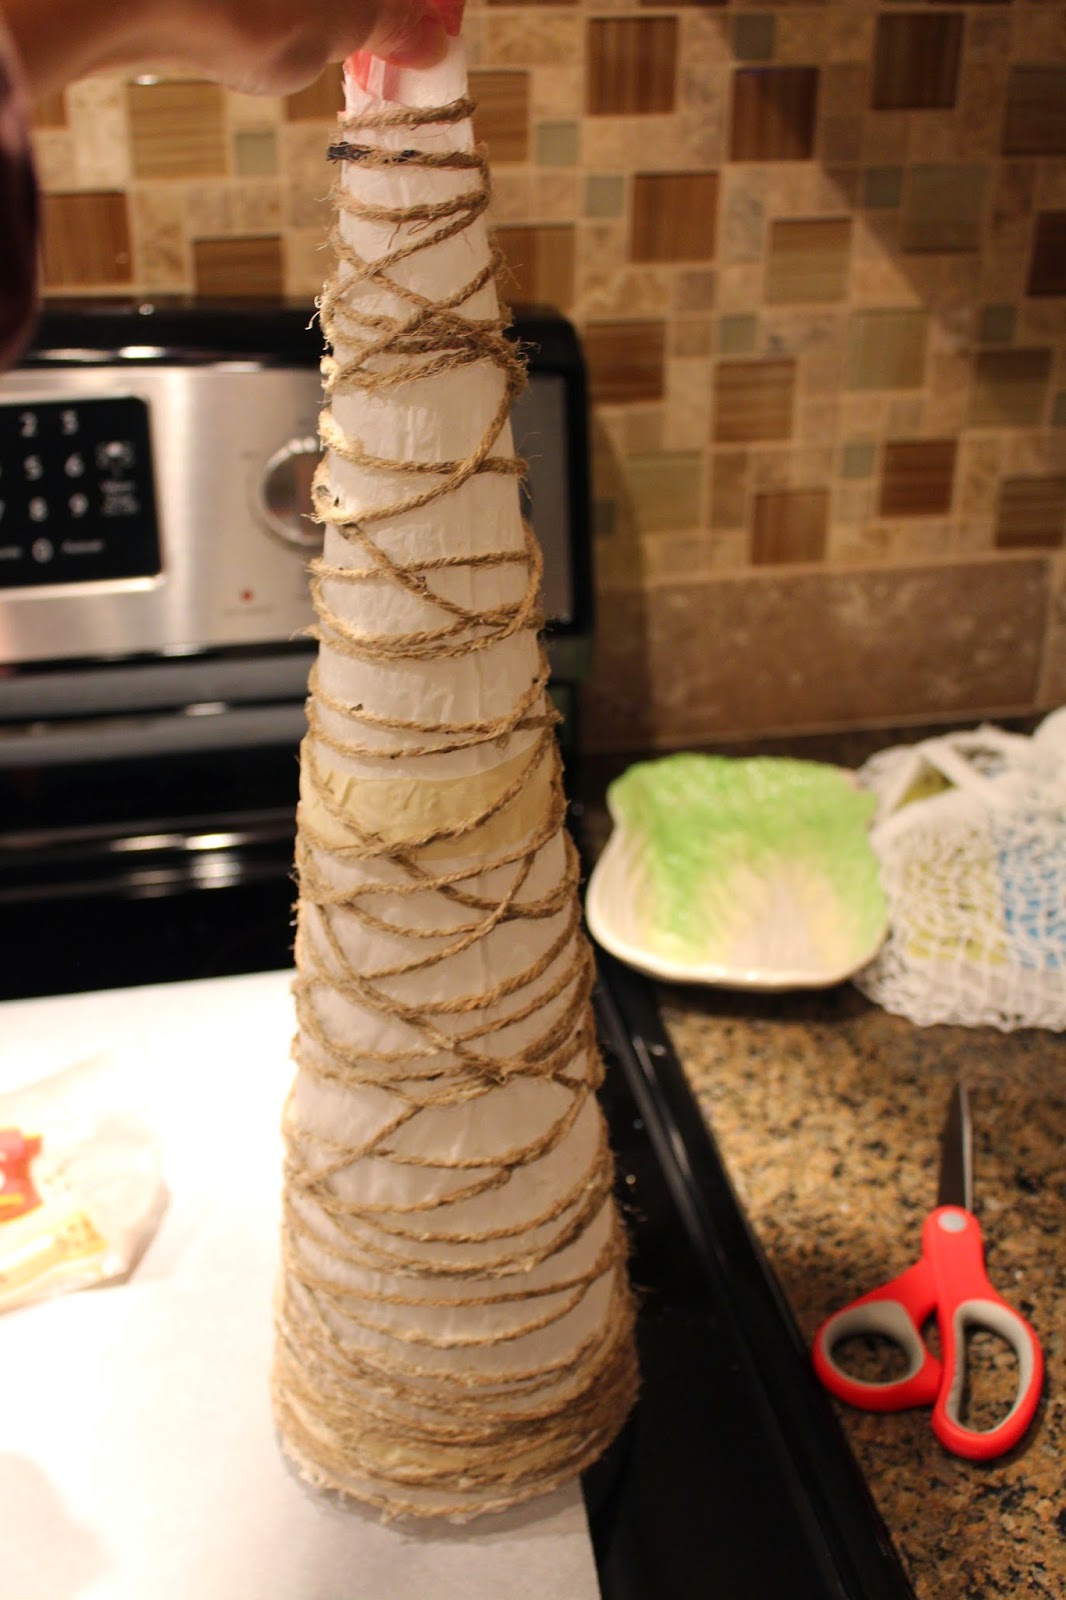 |
| Pry the paper from the dried twine |
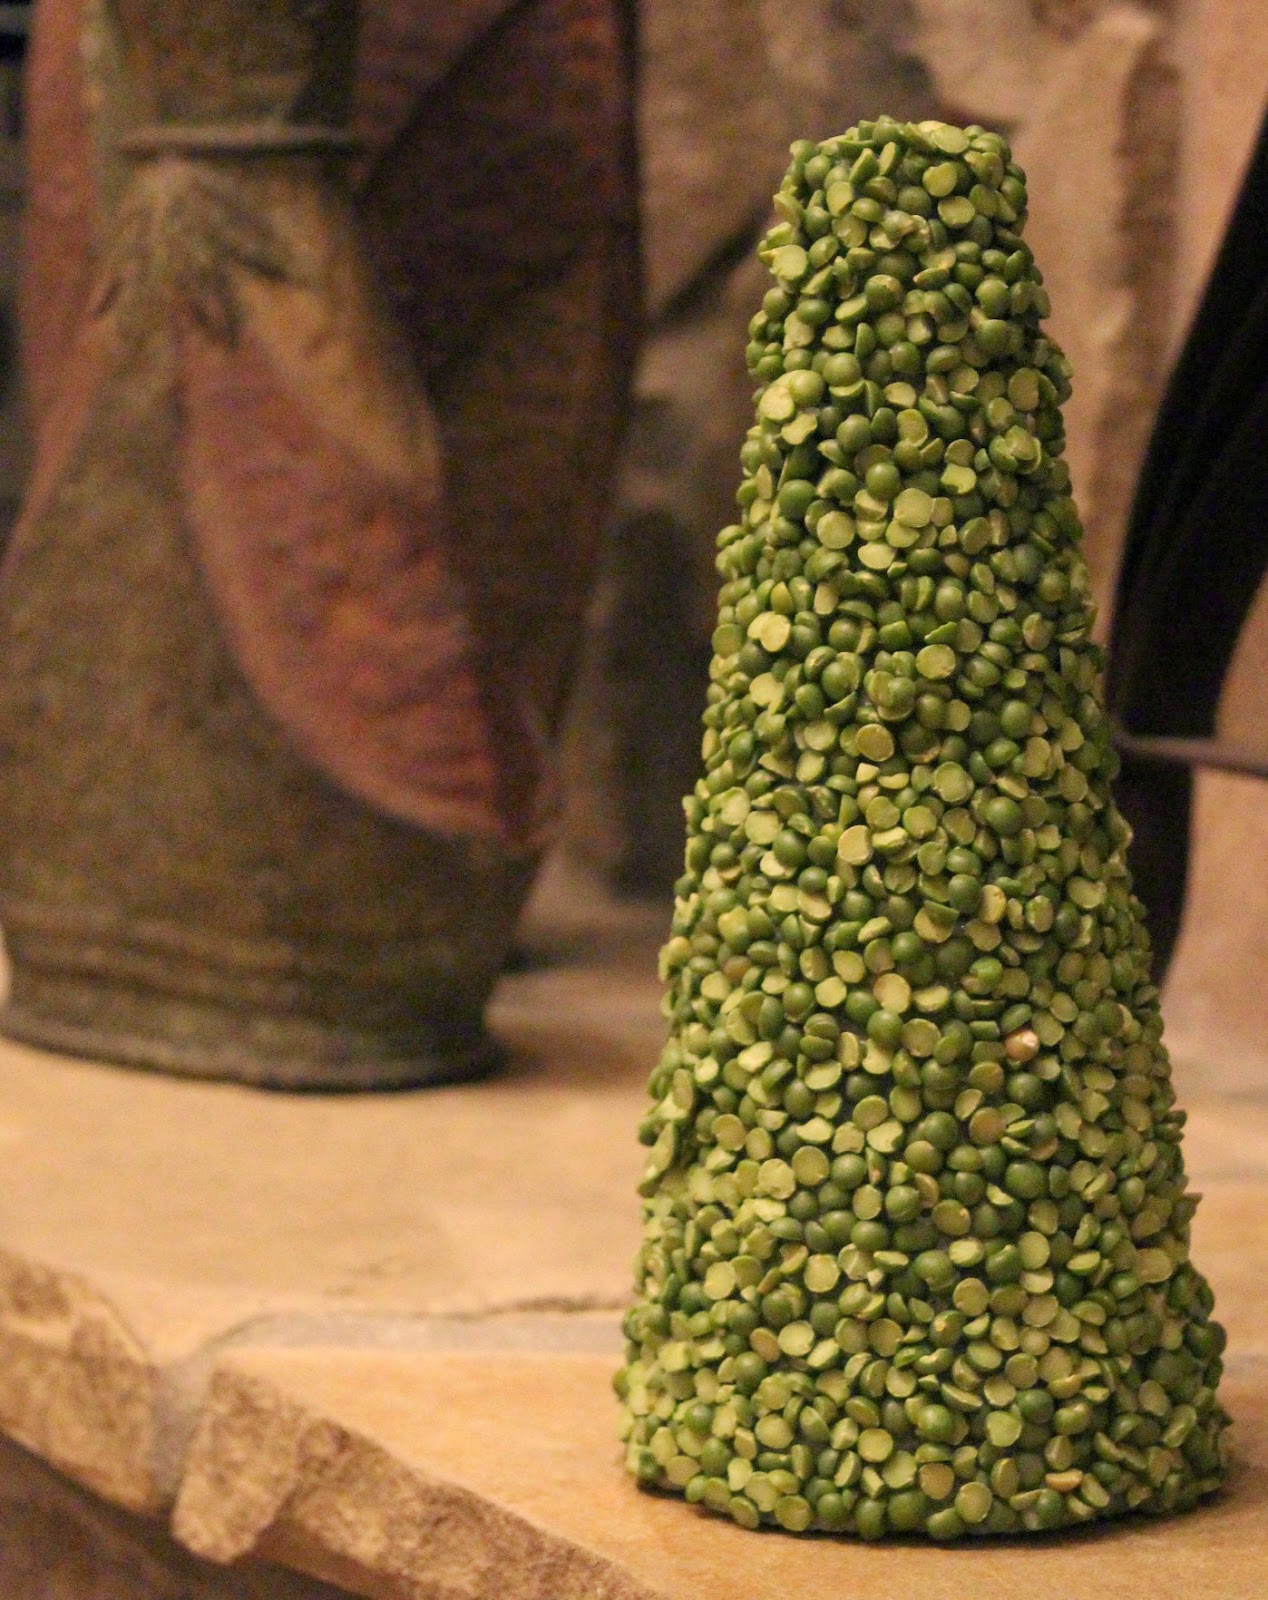
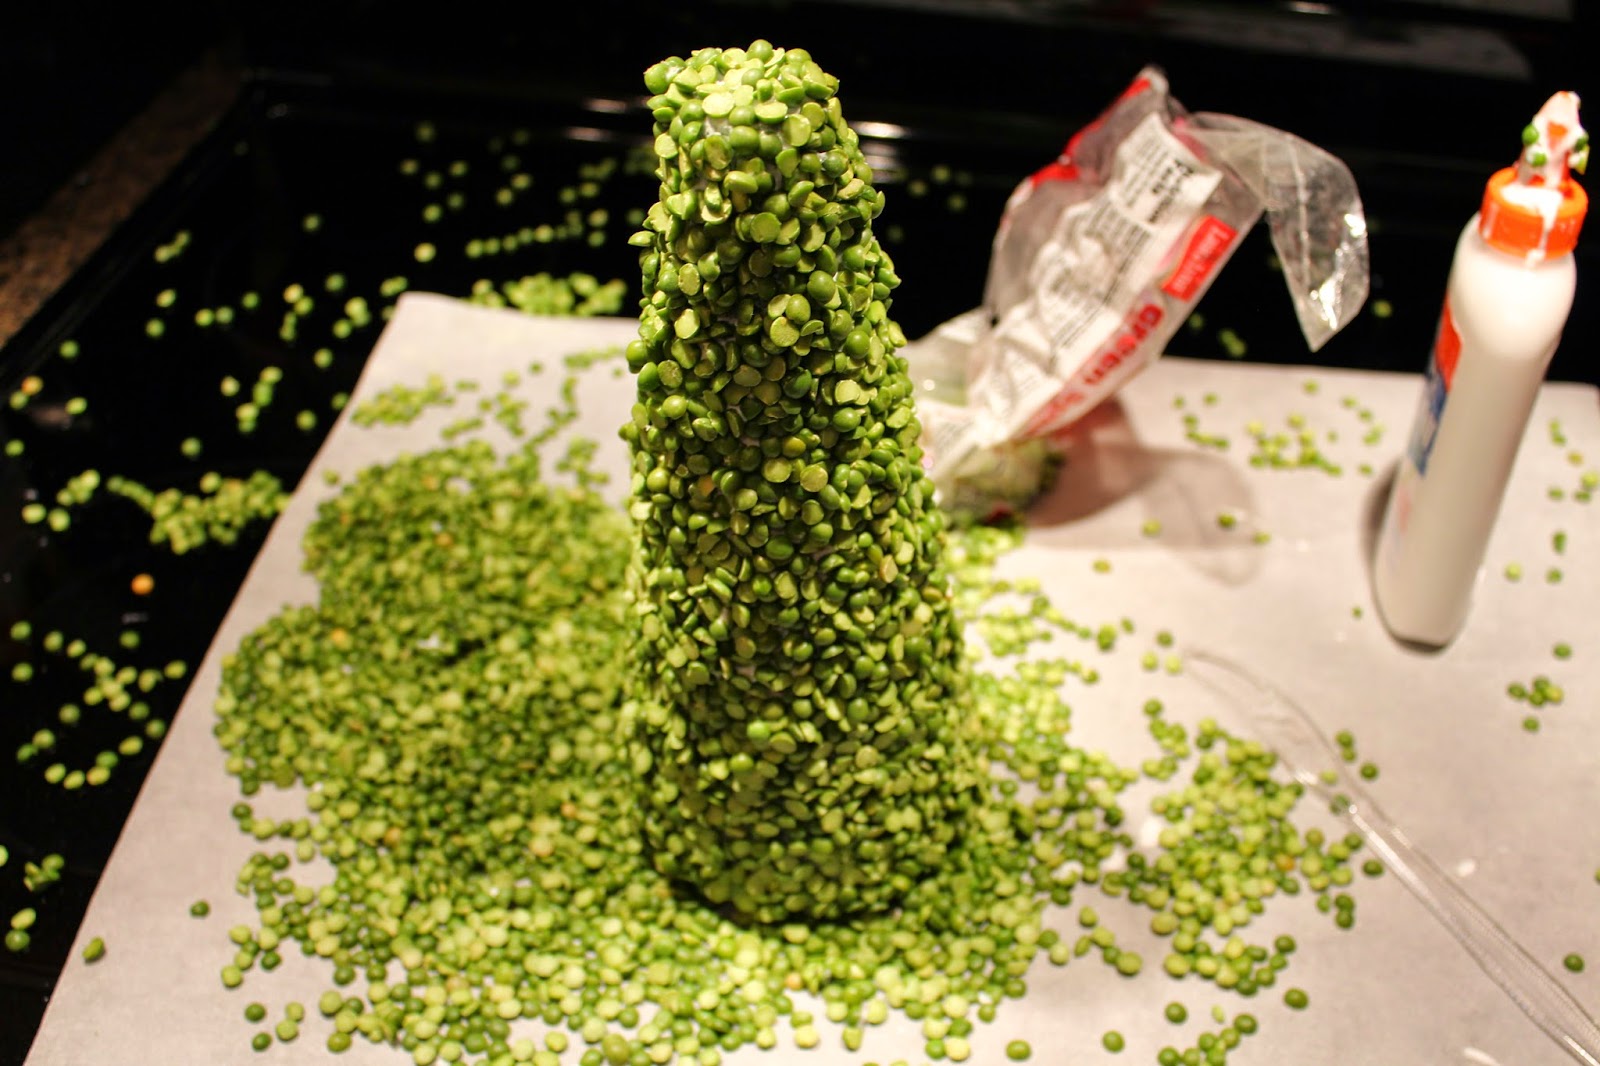
The next “tree” is easier than the first. I used split peas and love the organic look.
 |
| Split Pea Tree! |
This tree is very inexpensive. I used a 6 inch green floral cone that cost $2 and a bag of green split peas that were 88 cents, and glue. The cost is under $3 for the entire project. It took about 20 minutes to complete. You might even say it’s easy peasy….
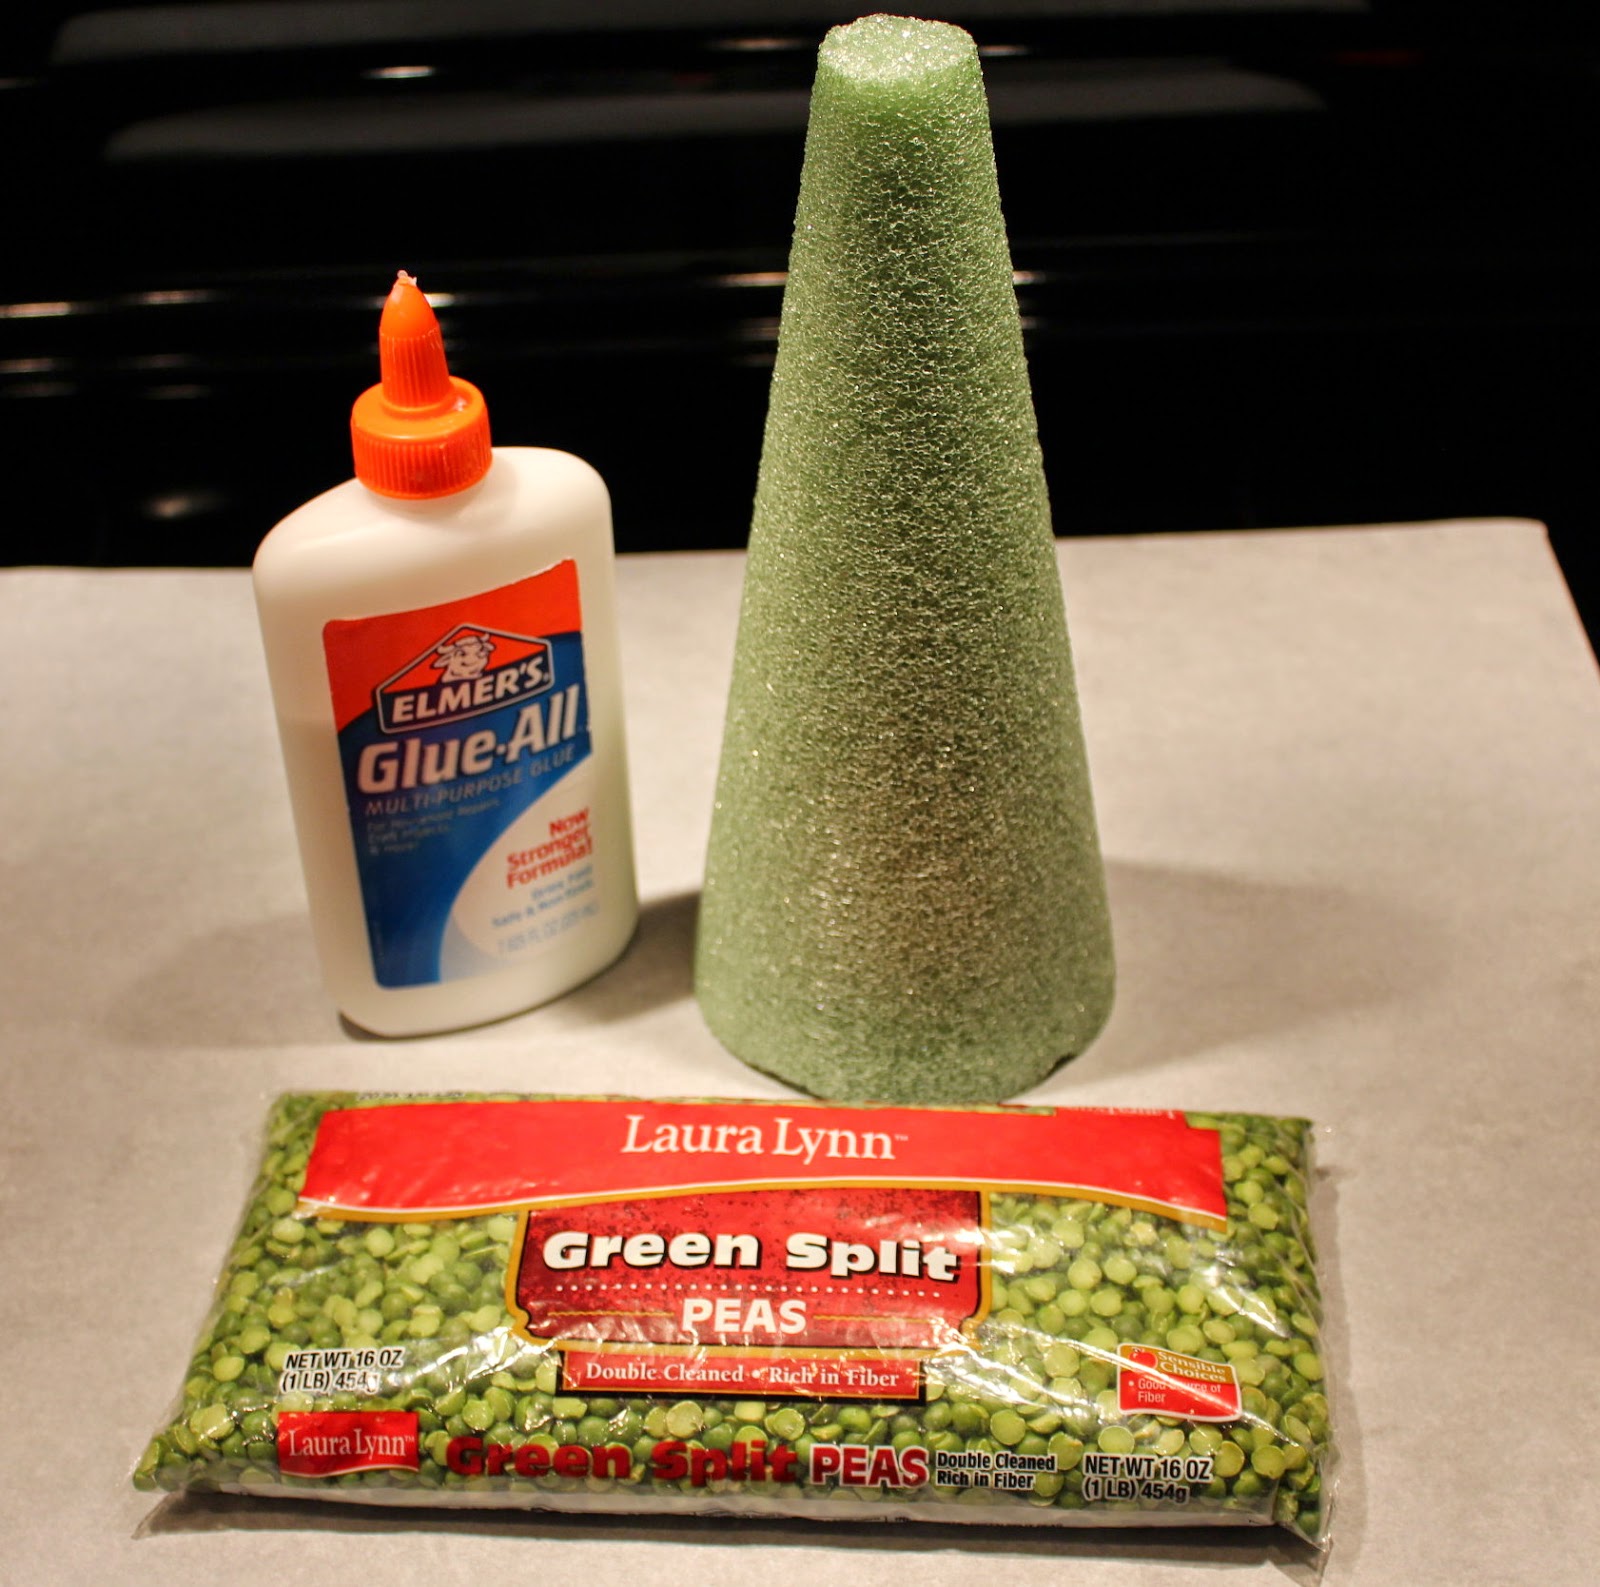 |
| Material List |
Spread glue onto the cone. Then sprinkle the split peas onto the glue. It helps to press the peas gently onto the cone.
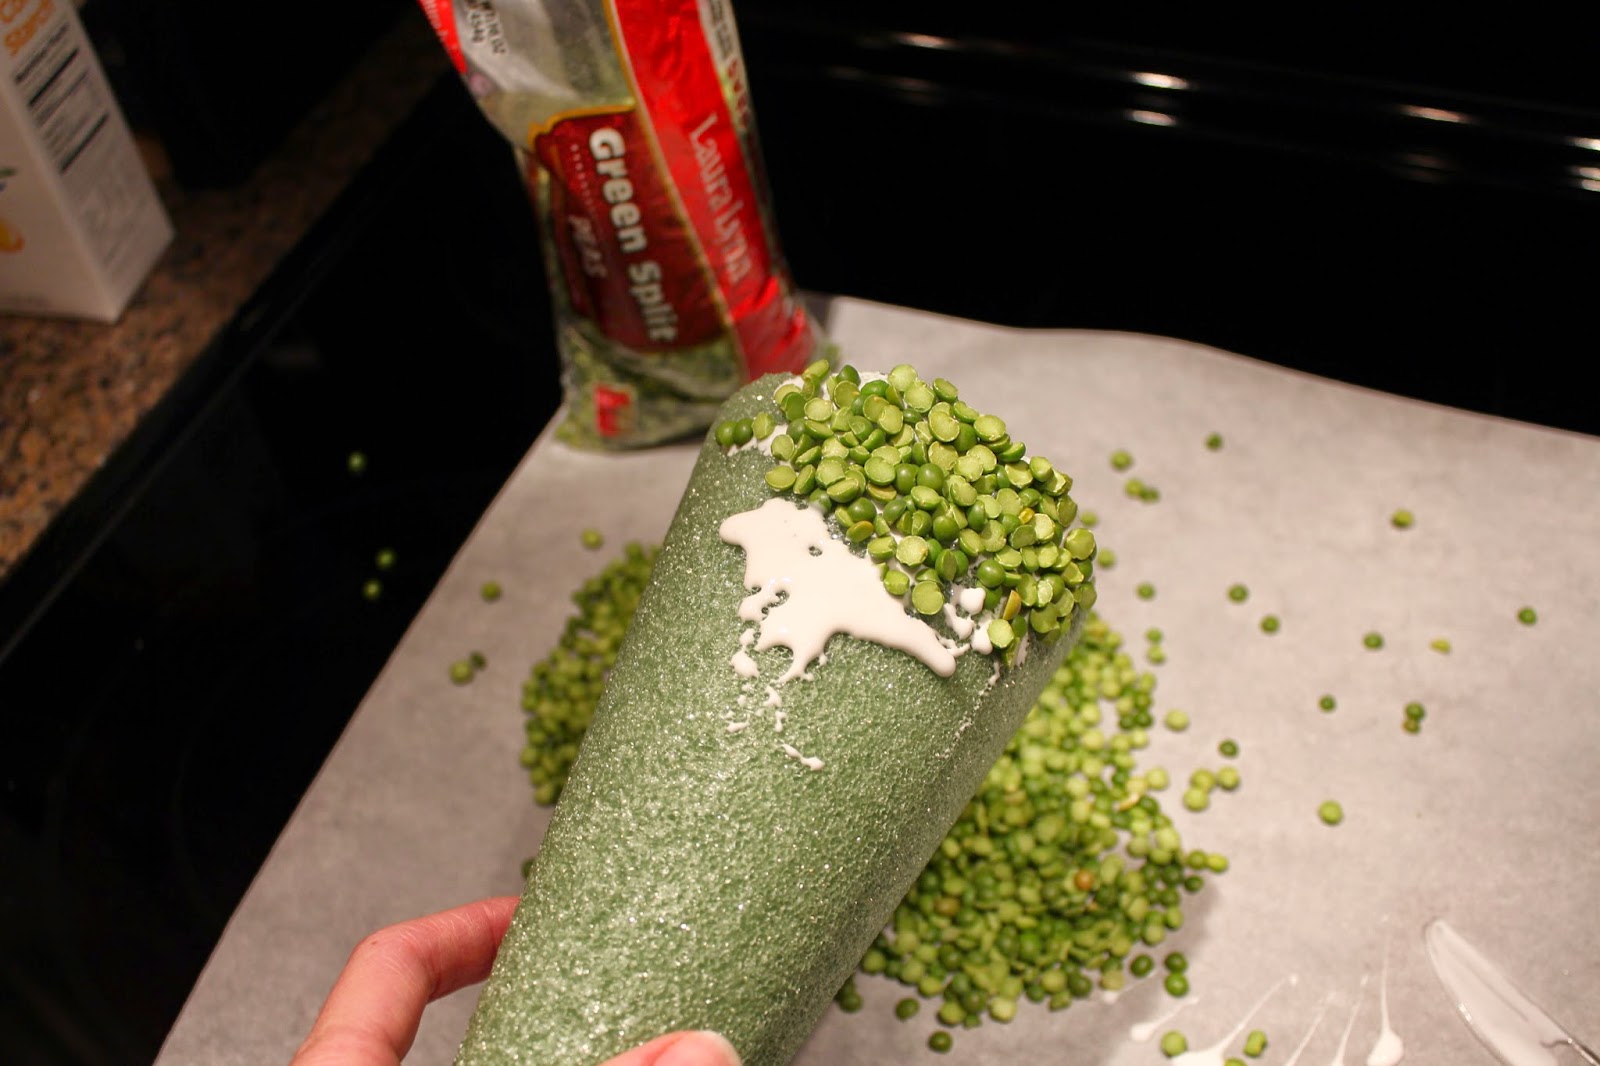 |
| Spread glue on the cone |
Continue to do this until the cone is completely covered in glued peas.
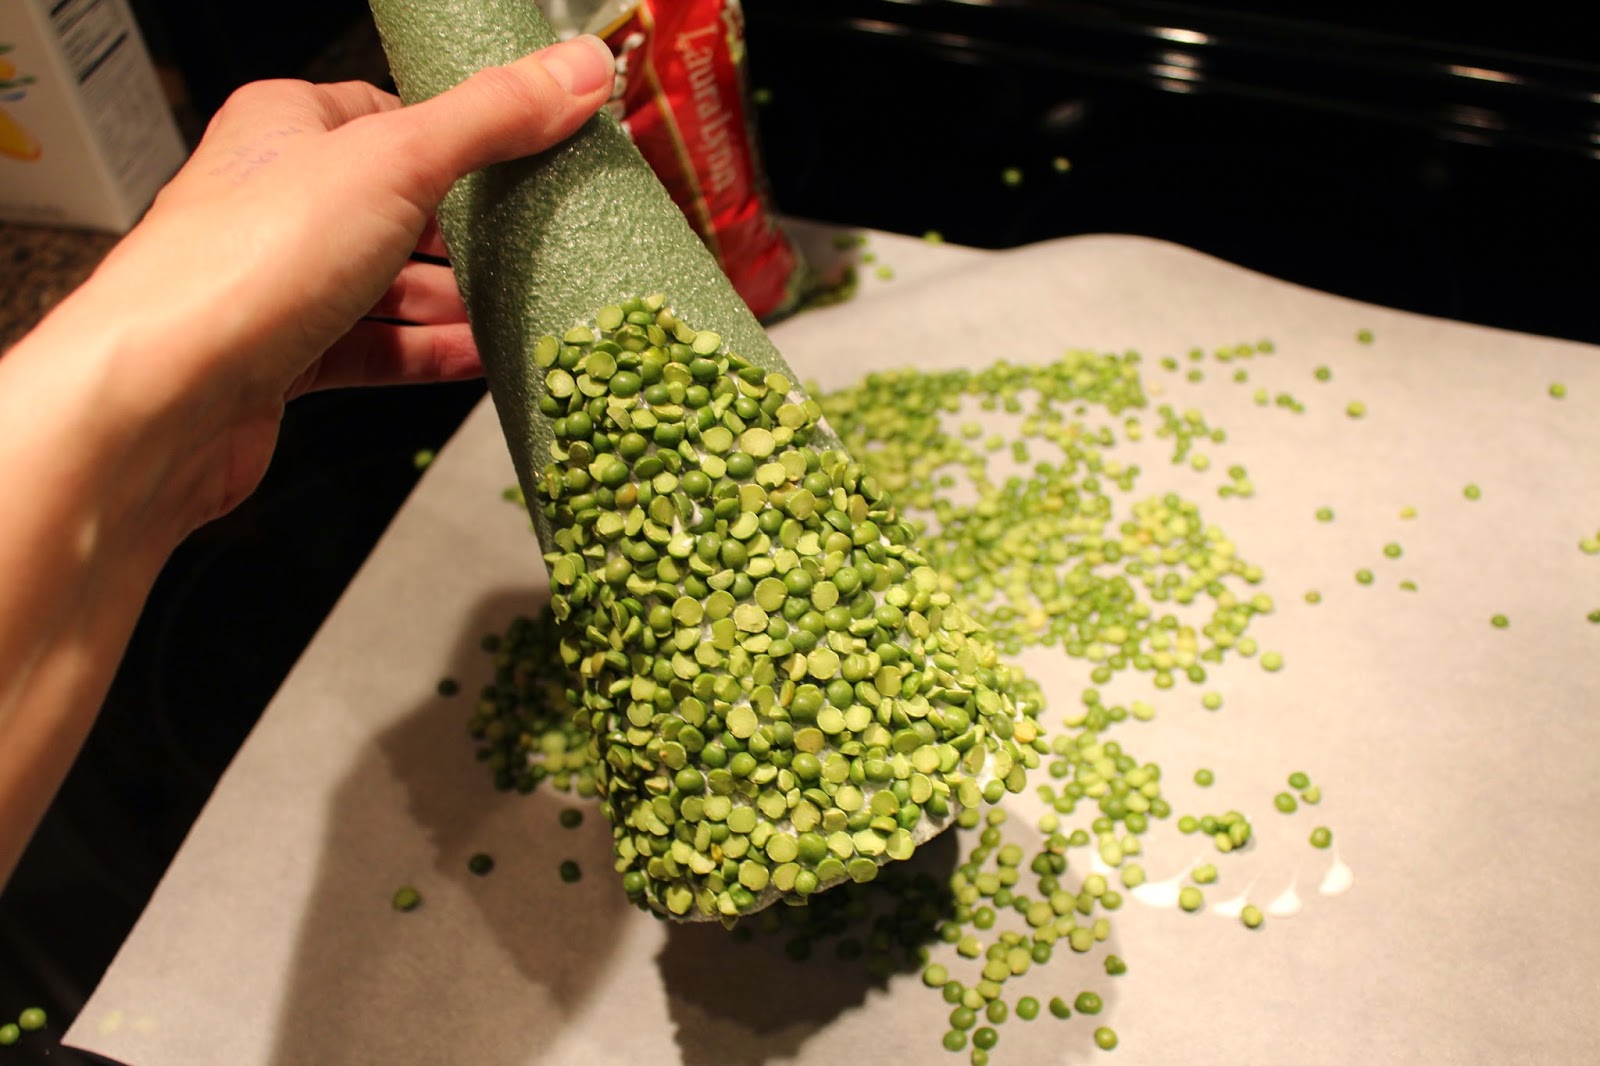 |
| Continue gluing the peas |
Once the cone is completely covered in peas, allow to dry overnight.
 |
| Allow glue to dry overnight |
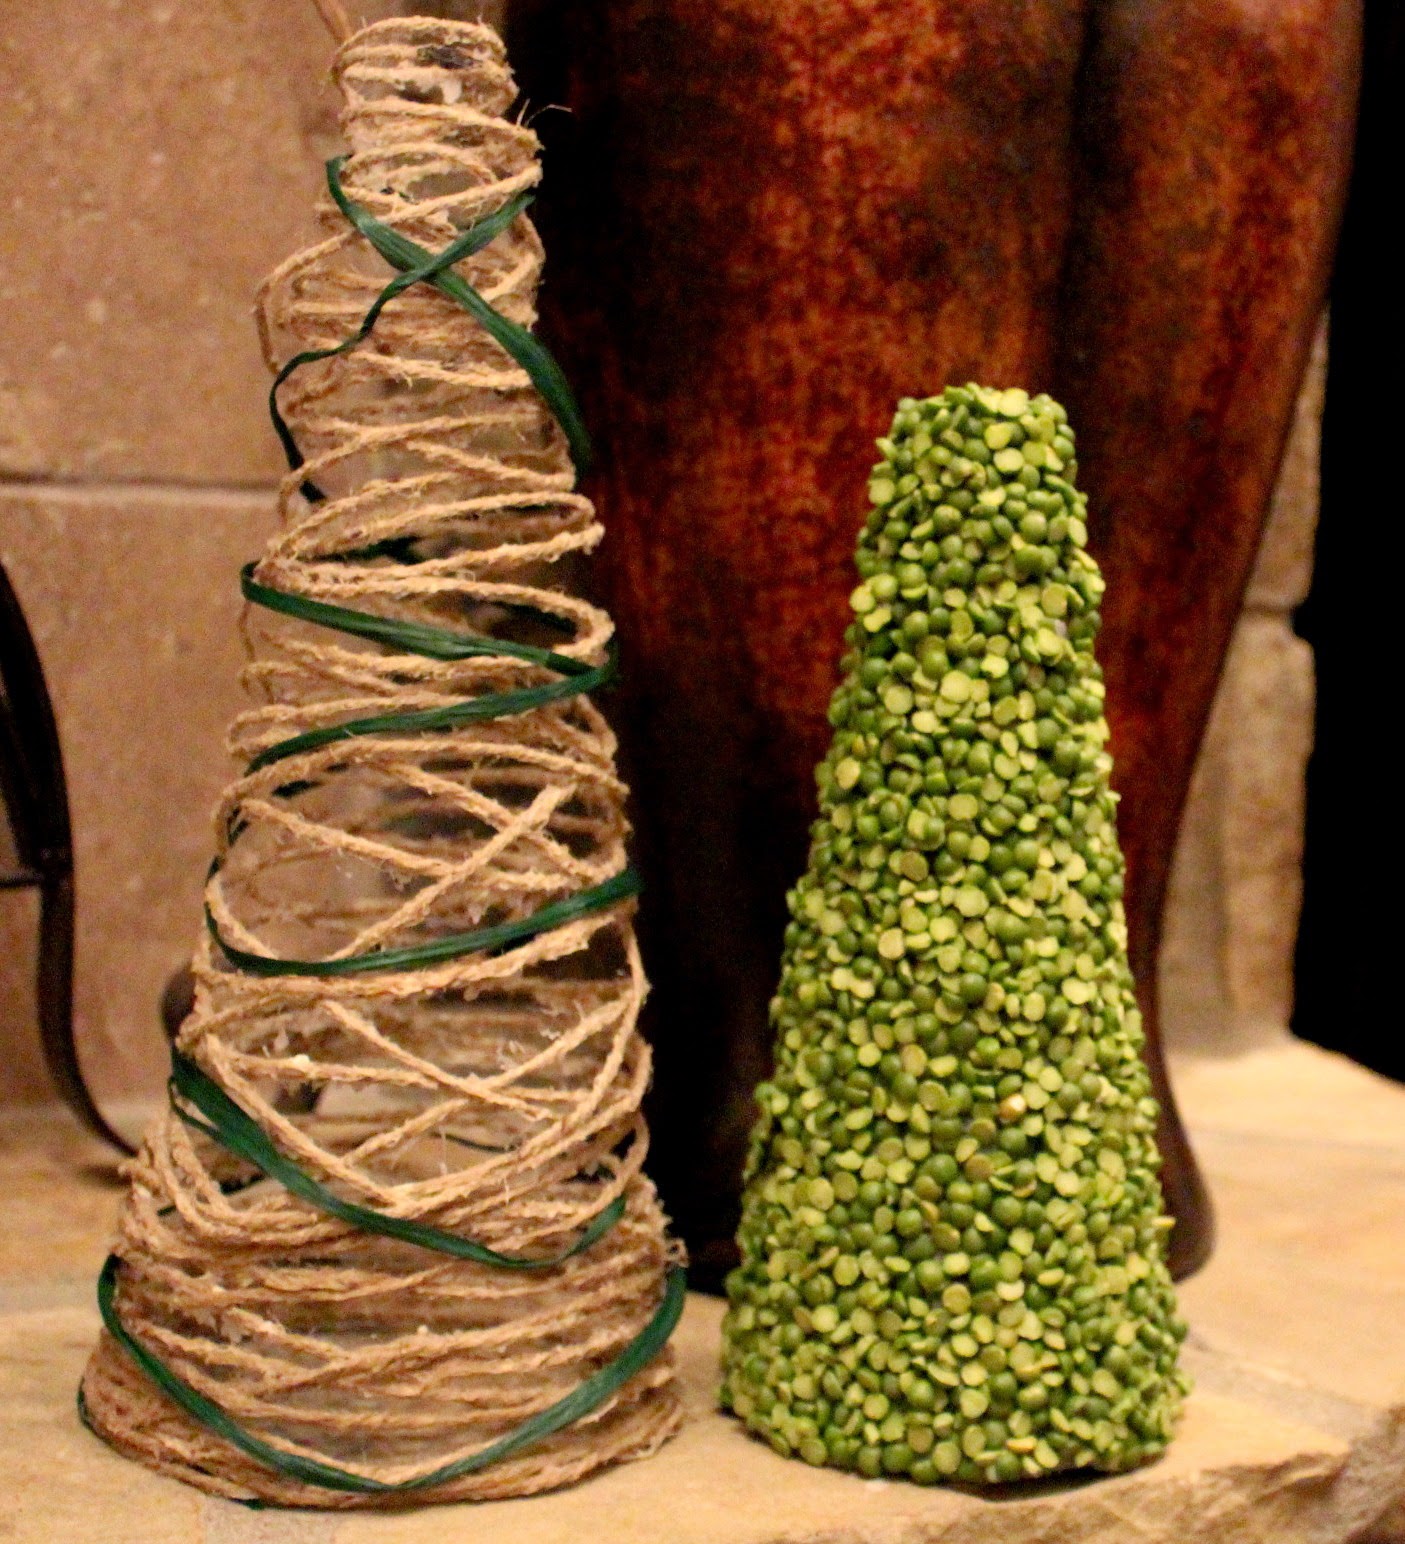 |
| Beautiful! |